Key takeaways
- For one BST-1, use one channel of a 4-ohm-stable amplifier rated around 50–100 W per channel.
- For two BST-1 units, use separate channels rather than wiring them together if you want independent front/rear effects.
- For a 2-ohm ButtKicker model, select an amplifier explicitly rated for 2-ohm operation.
- For four small 8-ohm exciters, a four-channel amplifier is usually simpler than combining loads in parallel.
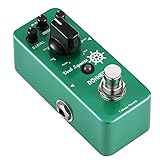
The best bass shakers for sim racing are Dayton Audio transducers for value, ButtKicker Gamer models for the most polished single-seat setup, and compact 40–100 W tactile exciters when you need discreet mounting or multi-zone feedback.
A bass shaker converts low-frequency audio telemetry into vibration through the rig. It can make wheel slip, ABS pulses, engine load, kerbs and gear shifts feel distinct, but the right choice depends less on maximum wattage than on mounting, frequency control, amplifier matching and whether vibration is allowed to reach the seat rather than the floor.
Our top picks


As an Amazon Associate we earn from qualifying purchases at no extra cost to you. Ratings are shown as listed on Amazon.
Best bass shakers for sim racing compared
| Product or type | Rated power | Impedance | Approx. size and weight | Best use | Typical market range |
|---|---|---|---|---|---|
| Dayton Audio BST-1 | 50 W RMS | 4 ohms | 5.25 in diameter; about 1.4 kg | One-seat budget build or two-zone rig | US$50–75 |
| Dayton Audio BST-2 | 35 W RMS | 4 ohms | About 4 in diameter; about 0.9 kg | Compact rigs and lighter seats | US$35–55 |
| ButtKicker Gamer Plus | Approx. 90 W RMS | 2 ohms | About 13 × 7 × 4 in; roughly 2.7 kg | Powerful single-seat feedback with integrated mounting | US$180–250 |
| Compact tactile exciter | 25–50 W RMS | Usually 4 or 8 ohms | Roughly 50–100 mm; under 0.5 kg | Direct seat-pan or pedal-plate mounting | US$20–60 each |
| High-output 100–150 W transducer | 100–150 W RMS | Usually 4 ohms | Typically 5–7 in; 1.5–3 kg | Heavy aluminium profile rigs and multi-channel systems | US$90–180 |
Published dimensions and weights can vary slightly by revision and region. Treat RMS power as the useful continuous rating, not the amplifier’s advertised peak figure.
Which shaker should you buy?
Best value: Dayton Audio BST-1
The BST-1 remains a strong starting point because its 50 W RMS rating, 4-ohm load and conventional bolt-on body fit common aluminium-profile, steel-tube and wooden rigs. One unit under the seat can provide convincing engine and kerb feedback; two units allow separate front and rear effects.
Its main limitation is installation. It does not include a convenient racing-specific bracket, so you may need a steel adapter plate, short bolts and a rigid connection to the seat rails or frame. It also benefits from a low-pass filter. Without filtering, road noise and full-range game audio can produce a muddy buzz instead of defined impacts.
Best compact option: Dayton Audio BST-2 or a small tactile exciter
Choose a smaller transducer when your rig has a narrow seat base, a foldable frame or limited clearance beneath the seat. Lower mass usually means less output, but it can be enough for a direct seat mount, especially when the shaker is attached to a thin metal plate that distributes vibration across the seat.
Small exciters are particularly useful for pedal feedback. A dedicated unit mounted to a pedal plate can carry ABS or wheel-lock pulses without making every seat effect equally strong. Verify the manufacturer’s power rating before using an amplifier channel rated above it.
Best premium single-seat choice: ButtKicker Gamer Plus
The Gamer Plus is designed around a racing-seat installation and offers substantially more output than small exciters. Its 2-ohm impedance is important: the amplifier must be stable at 2 ohms and must not be connected in a way that presents an unsafe load. A normal 4-ohm stereo amplifier is not automatically suitable.
Its integrated-style mounting approach can save fabrication time, and the higher output gives more headroom for low-frequency engine and kerb effects. The trade-off is cost, greater power demand and more vibration transferred into the supporting floor if the rig is not isolated.
Head-to-head: one powerful shaker or several smaller ones?
| Setup | Tactile response | Installation difficulty | Best feedback layout |
|---|---|---|---|
| One 50–90 W shaker under the seat | Strong but blended | Low to moderate | Engine, gear shifts, general road texture |
| Two 35–50 W shakers, front and rear | Clearer direction and weight transfer | Moderate | Front/rear kerbs, suspension and drivetrain effects |
| Three or four compact shakers | Most spatially informative | High | Seat, pedals and front/rear zones independently |
| One 100–150 W shaker on a heavy rig | Very strong, but still one location | Moderate | Large fixed rigs where maximum impact matters |
For realistic racing feedback, two moderate shakers usually beat one oversized unit. Separate channels let software send front-wheel slip to the front zone and rear-wheel slip to the rear zone. A high-powered single shaker can feel impressive, but it cannot tell you where the event occurred.
Amplifier pairing: the specification that prevents disappointment
Match three numbers: impedance, continuous power and channel count. A 4-ohm, 50 W RMS shaker needs an amplifier that can deliver roughly 50 W RMS into 4 ohms without clipping. For cleaner headroom, an amplifier rated around 60–100 W per channel at 4 ohms is practical, provided the shaker’s gain is limited in software.
- For one BST-1, use one channel of a 4-ohm-stable amplifier rated around 50–100 W per channel.
- For two BST-1 units, use separate channels rather than wiring them together if you want independent front/rear effects.
- For a 2-ohm ButtKicker model, select an amplifier explicitly rated for 2-ohm operation.
- For four small 8-ohm exciters, a four-channel amplifier is usually simpler than combining loads in parallel.
Small class-D amplifiers are popular because they are inexpensive and efficient, but some compact models advertise peak power at a higher supply voltage than the included power adapter provides. Compare the RMS output at the impedance you actually use. Add a physical volume control or keep the amplifier accessible while tuning.
Software compatibility and tactile tuning
SimHub is the most flexible choice for telemetry-driven effects across many racing simulators. It can assign effects to separate sound-card outputs and lets you adjust frequency, gain, threshold and output routing. SimShaker, SRS and game-specific telemetry tools can also be useful, depending on the simulator and your preferred workflow.
USB audio output is often simpler than trying to share your computer’s main headphone output. In Windows, assign the USB sound device to the shaker output, then send its line-level signal to the amplifier. Avoid sending amplified speaker output into another amplifier.
Start with a narrow effect set: gear shift, ABS, wheel slip, engine RPM and road impacts. Set each effect low, then raise it until it is noticeable without masking the others. Use different frequency bands where possible: a low rumble for engine load, a sharper pulse for ABS, and short impact bursts for kerbs. More effects do not automatically create more realism.
Mounting and frame isolation matter more than raw wattage
Mount the transducer to a rigid part of the structure connected to the seat or pedals. A thin adapter plate can spread energy effectively, while a loose bracket wastes it as rattling noise. Use locking nuts or thread-locking compound, and check bolt clearance before loading into the seat.
Isolation determines where the vibration goes. Rubber feet beneath the rig reduce transmission into a wooden or upstairs floor, while isolators between a seat and frame can prevent seat feedback from reaching the rest of the rig. Do not isolate the shaker itself from the part you want to vibrate: placing it on soft foam usually absorbs the response.
A useful arrangement is a rigid seat frame with isolating feet underneath the complete rig. This keeps the seat and pedals connected for feedback while limiting floor-borne vibration. Hard floors, heavy steel frames and direct mounting generally require less amplifier power than flexible frames.
Decision matrix for different sim racers
| Your situation | Recommended approach | Why |
|---|---|---|
| Under US$150, first build | One BST-1 plus a 4-ohm class-D amplifier | Good output with low wiring and mounting complexity |
| Regular league racing | Two BST-1 units on separate channels | Front/rear separation improves fault and kerb location |
| Small or foldable rig | BST-2 or compact exciters | Lower mass and easier clearance management |
| Maximum impact from one seat | ButtKicker Gamer Plus with a suitable 2-ohm amplifier | High output and racing-oriented mounting |
| Advanced four-zone setup | Four compact transducers and a four-channel amplifier | Independent seat, pedal, front and rear effects |
Setup calculation: choosing amplifier headroom
Suppose you install two 50 W RMS, 4-ohm BST-1 units. Each channel should comfortably support about 50 W RMS at 4 ohms. An amplifier rated at 75 W per channel into 4 ohms provides approximately 1.5 times the shaker’s continuous rating, leaving useful headroom while software gain limits average output. It does not mean you should run the shaker continuously at 75 W; sustained overdrive creates heat and mechanical stress.
If you instead connect two 4-ohm shakers in parallel to one channel, the nominal load becomes 2 ohms. That can overload an amplifier designed only for 4 ohms, and it removes independent front/rear control. Separate channels are normally the safer and more informative solution.
Durability and ownership realities
The parts most likely to cause trouble are loose fasteners, overheated amplifiers, damaged speaker cable and excessive gain. Bass shakers have moving mechanical assemblies, so constant maximum output can eventually produce rattling or reduced response. Inspect mounts every few months, especially on profile rigs whose bolts can loosen with vibration.
Keep the transducer dry and clear of carpet fibres, pet hair and dust. Do not cover an amplifier’s vents, and leave space around its power supply. If feedback suddenly becomes weak, check the software output device, Windows volume, cable polarity and amplifier protection mode before replacing hardware.
For most buyers, start with one Dayton Audio BST-1 if budget is the priority, or two units if you want meaningful directional information. Choose the ButtKicker Gamer Plus when you value a stronger, more integrated single-seat installation and have a suitable 2-ohm amplifier. In every case, careful mounting, sensible isolation and restrained SimHub tuning will contribute more to realism than simply buying the highest wattage.