Key takeaways
- Change the router login name away from “admin” and use a long, unique password.
- Set “Enable Web Access from WAN” to No unless you truly need remote management; use the ASUS app or a VPN instead.
- Set the authentication method to HTTPS (or both HTTP and HTTPS) so the GUI password is not sent in plain text on your LAN.
- Leave SSH and Telnet disabled unless you use them.
To open the ASUS router web GUI, connect to the router’s Wi-Fi or a LAN port and go to http://router.asus.com or http://192.168.50.1 in a browser (older models use 192.168.1.1), then sign in with the admin name and password you created during setup. This guide maps where the important settings live in the ASUSWRT interface and lists the changes worth making on day one, with the reason behind each.
Our top picks


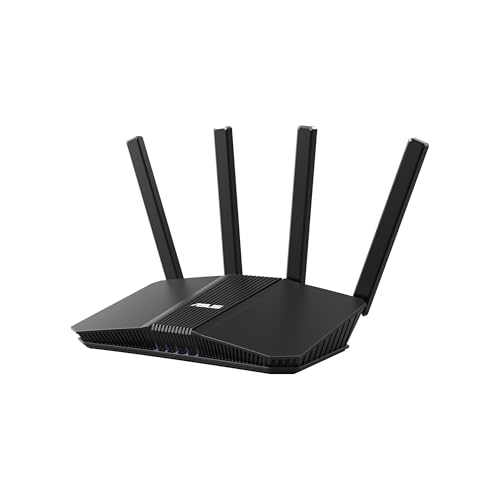

As an Amazon Associate we earn from qualifying purchases at no extra cost to you. Ratings are shown as listed on Amazon.
Getting into the interface
| Address | When it works |
|---|---|
| http://router.asus.com | Any ASUS router, as long as your device uses the router for DNS |
| http://192.168.50.1 | Default LAN IP on most ASUS routers from roughly 2018 onward (RT-AX, RT-BE, GT, ZenWiFi) |
| http://192.168.1.1 | Older RT-N and some RT-AC models |
| https://192.168.50.1:8443 | When you have switched the GUI to HTTPS (port 8443 is the usual default) |
A brand-new or reset router opens the Quick Internet Setup wizard and forces you to create a login name and password. Older firmware used admin/admin, which is why changing it matters. If the page will not load, disconnect from any VPN, try the IP instead of the hostname, and make sure your device has an address in the router’s range (for example 192.168.50.x). Many ASUS routers can also be managed from the ASUS Router app, but several advanced pages exist only in the web GUI.
A map of the main menus
Most ASUSWRT firmware shares the same layout: a General section of feature pages on the left, and an Advanced Settings section below it. Wi-Fi 7 models with ASUSWRT 5.0 rearrange some items but keep the same names.
| Menu | What lives there | Visit when |
|---|---|---|
| Network Map | Internet status, connected clients, quick Wi-Fi name and password | Checking who is connected |
| AiMesh | Mesh nodes, backhaul type, node firmware | Adding or troubleshooting mesh units |
| Guest Network | Up to several guest SSIDs per band, time limits, intranet access | Visitors, smart home devices |
| AiProtection | Router Security Assessment, malicious site blocking, parental controls | Security review |
| Adaptive QoS / Traffic Analyzer | Bandwidth priorities, usage statistics | Gaming or work-call lag |
| Wireless | SSID, security, channels, WPS, professional radio settings | Wi-Fi speed or compatibility issues |
| LAN | LAN IP, DHCP range, manually assigned IPs | Fixed addresses for printers, NAS, consoles |
| WAN | Connection type, DNS, port forwarding, DDNS, UPnP | ISP setup, game servers, remote access |
| VPN | VPN server (OpenVPN, IPSec, WireGuard on newer firmware), VPN Fusion client | Remote access or routing traffic through a VPN |
| Firewall | Firewall toggle, URL and keyword filters, IPv6 firewall | Blocking sites or inbound traffic |
| Administration | Login, remote access, firmware, backup and restore | Security hardening, updates |
| System Log / Network Tools | Logs, ping, traceroute, DHCP lease list | Diagnosing drops |
Recommended settings, in order
1. Update firmware and turn on automatic updates
Go to Administration, then Firmware Upgrade. Install the latest version and, where offered, enable automatic security or firmware updates. Router firmware patches fix vulnerabilities that attackers actively scan for.
2. Lock down administration
Under Administration, then System:
- Change the router login name away from “admin” and use a long, unique password.
- Set “Enable Web Access from WAN” to No unless you truly need remote management; use the ASUS app or a VPN instead.
- Set the authentication method to HTTPS (or both HTTP and HTTPS) so the GUI password is not sent in plain text on your LAN.
- Leave SSH and Telnet disabled unless you use them.
3. Wi-Fi security and radio settings
Under Wireless, then General, set each band as follows:
| Setting | 2.4 GHz | 5 GHz | 6 GHz (if present) |
|---|---|---|---|
| Authentication | WPA2/WPA3-Personal | WPA2/WPA3-Personal | WPA3-Personal (required) |
| Channel bandwidth | 20 MHz | 80 MHz (160 MHz if few neighbors and your devices support it) | 160 or 320 MHz on Wi-Fi 7 |
| Control channel | Auto, or fixed 1, 6 or 11 | Auto, or a fixed non-DFS channel (36–48 or 149–165) if you see drops | Auto |
| Wireless mode | Auto with 802.11ax on | Auto with 802.11ax on | Auto |
Why these values: 20 MHz on 2.4 GHz avoids overlapping neighbors and improves range; DFS channels on 5 GHz can force the router to switch channels when radar is detected, which briefly disconnects clients. WPA2/WPA3 mixed mode keeps older devices working while newer ones get WPA3. If an older smart plug refuses to connect, put it on a 2.4 GHz guest network set to WPA2 instead of weakening your main network.
Smart Connect (one name for all bands) is convenient on single-floor homes. If a device keeps landing on 2.4 GHz at close range, turn Smart Connect off and give each band its own name.
4. Turn off WPS
Under Wireless, then WPS, disable it. WPS PIN pairing has a long history of weaknesses, and you can type the password on any device that needs it.
5. Review UPnP and port forwarding
UPnP (under WAN, then Internet Connection) lets consoles and apps open ports automatically. Leave it on if you game and need open NAT; turn it off if you do not, since any device on your network can use it. For servers, create explicit rules under WAN, then Virtual Server / Port Forwarding instead.
6. Set DNS and reserve important IPs
- Under WAN, then Internet Connection, you can set custom DNS servers. Newer firmware also offers DNS-over-TLS under DNS Privacy Protocol for encrypted lookups.
- Under LAN, then DHCP Server, use Manually Assigned IP to give a NAS, printer or game console a fixed address. Port forwarding rules depend on this.
7. Run the Router Security Assessment and back up
In AiProtection, the Router Security Assessment flags weak settings such as default credentials, WPS on or remote access enabled. Fix what it finds, then go to Administration, then Restore/Save/Upload Setting and save a configuration file. If you ever reset the router, restoring this file brings everything back in minutes.
Settings to leave alone
- Transmit power: keep it at the default or Performance; lowering it rarely helps unless you are tuning a mesh.
- Beacon interval, DTIM, RTS threshold: defaults are fine for nearly all homes.
- MTU: change only if your ISP specifies a value, typically 1492 for PPPoE.
- Hardware acceleration / NAT acceleration: keep enabled; disabling it can cut throughput sharply on fast connections.
Common GUI problems
If router.asus.com opens an ASUS website instead of your router, your device is using an outside DNS server; use the IP address. If you forgot the login, a factory reset (hold the reset button for about 5 to 10 seconds until the power LED flashes) is the only route, which is why saving a configuration backup is worth doing now. If a page shows blank fields, clear the browser cache or try a private window, since cached scripts from an older firmware version can break the layout.