Key takeaways
- Connect to the ONT’s WiFi network, or run an Ethernet cable from your PC to any LAN port on the ONT.
- Open a browser and type http://192.168.1.1 into the address bar (not the search bar).
- Enter the username and password. Check the sticker on the bottom or back of the unit first. If there’s no sticker, try admin/admin, then support/support. On some Nokia units Airtel provisions a custom admin password — if the defaults fail, call 121 and ask for it.
- If the page won’t load at all, check your PC’s gateway: run
ipconfig(Windows) or check network details (macOS/Linux). Whatever the “Default Gateway” shows is the correct address — some configurations use 192.168.1.254 instead.
What's inside
To log in to your Airtel Xstream Fiber router (the ONT installed with your connection), connect to its WiFi or plug into a LAN port, open a browser, go to 192.168.1.1, and sign in with the credentials printed on the sticker underneath the unit — usually admin/admin. From there you can change your WiFi name and password in under a minute, and switch the WAN connection to bridge mode if you want your own router to handle PPPoE and routing. This guide covers all three tasks, plus what the box actually costs and when bridging is worth the effort.
As an Amazon Associate we earn from qualifying purchases at no extra cost to you.

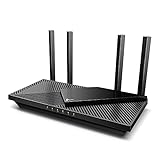


What the Airtel Xstream Fiber router actually is
The device Airtel installs is an ONT (Optical Network Terminal) with a built-in router — it converts the GPON fiber signal to Ethernet and then routes, NATs, and broadcasts WiFi. Airtel ships different models depending on circle and stock, most commonly the Nokia G-2425G-A, Huawei HG8145V5, or ZTE F670L. The admin pages differ slightly between them, but the logic is identical.
| Specification | Nokia G-2425G-A | Huawei HG8145V5 | ZTE F670L |
|---|---|---|---|
| WiFi standard | Wi-Fi 6 (AX3000 class) | Wi-Fi 5 (AC1200 class) | Wi-Fi 5 (AC1200 class) |
| 5 GHz radio | 4×4, up to ~2400 Mbps link | 2×2, up to 867 Mbps link | 2×2, up to 867 Mbps link |
| 2.4 GHz radio | 2×2, up to ~574 Mbps link | 2×2, up to 300 Mbps link | 2×2, up to 300 Mbps link |
| LAN ports | 4× Gigabit Ethernet | 4× Gigabit Ethernet | 4× Gigabit Ethernet |
| Voice (FXS) port | Yes, 1× RJ-11 | Yes, 1× RJ-11 | Yes, 1× RJ-11 |
| Mesh support | EasyMesh capable | No | No |
The practical takeaway: if you have the Nokia unit and a plan up to ~200 Mbps, the built-in WiFi is genuinely decent. The Huawei and ZTE units top out around 400–500 Mbps real-world on 5 GHz in the same room, and their coverage drops fast through walls — which is why many users on 500 Mbps or 1 Gbps plans bridge them to a better router.
How to log in at 192.168.1.1
- Connect to the ONT’s WiFi network, or run an Ethernet cable from your PC to any LAN port on the ONT.
- Open a browser and type http://192.168.1.1 into the address bar (not the search bar).
- Enter the username and password. Check the sticker on the bottom or back of the unit first. If there’s no sticker, try admin/admin, then support/support. On some Nokia units Airtel provisions a custom admin password — if the defaults fail, call 121 and ask for it.
- If the page won’t load at all, check your PC’s gateway: run
ipconfig(Windows) or check network details (macOS/Linux). Whatever the “Default Gateway” shows is the correct address — some configurations use 192.168.1.254 instead.
Change the WiFi name and password
- Once logged in, go to Network → Wireless (2.4 GHz / 5 GHz) on Nokia units, or WLAN → SSID Settings on Huawei/ZTE.
- Set the SSID to the name you want. Do this separately for each band.
- Set the Security mode to WPA2-PSK (AES) at minimum. If the Nokia offers WPA2/WPA3 mixed, use it — it’s backward compatible and more secure. Never use WEP or WPA-TKIP.
- Enter a password of 12+ characters, then save/apply. All devices will disconnect and you’ll need to rejoin with the new password.
Two settings worth the extra click: leave band steering / smart connect on if you want one network name for both bands (fine for most homes), or give 2.4 GHz and 5 GHz different names if you want to force laptops onto 5 GHz manually. Keep 5 GHz channel width at 80 MHz and let the channel stay on Auto unless you have heavy neighbor interference.
Router mode vs bridge mode: which do you need?
Bridging disables the ONT’s routing function and passes the raw internet connection to your own router via PPPoE. It’s not always necessary — here’s the honest decision:
| Your situation | Recommended setup | Why |
|---|---|---|
| Plan ≤200 Mbps, Nokia ONT, no port forwarding needs | Keep router mode | Built-in Wi-Fi 6 handles it; zero maintenance |
| Plan 500 Mbps+, ONT in a corner/cabinet | Bridge mode + own Wi-Fi 6 router | ONT WiFi wastes the plan’s headroom |
| Gaming, hosting servers, VPN inbound | Bridge mode | Avoids double NAT; port forwarding works cleanly |
| Want better WiFi but can’t get PPPoE credentials | Own router in Access Point mode | Gets you better radios without touching WAN settings |
| Airtel landline voice port in use | Bridge only the INTERNET WAN | Voice runs on a separate WAN entry — leave it alone |
How to enable bridge mode on the Airtel ONT
- Log in at 192.168.1.1 and go to Network → WAN (Nokia) or WAN Connection (Huawei/ZTE).
- You’ll see multiple WAN entries: typically INTERNET (Route/PPPoE mode), VOIP, and TR069. Modify only the INTERNET one. Do not touch VOIP or TR069 — TR069 is how Airtel remotely provisions the box, and deleting it can leave you with no internet and a support visit.
- Change the connection mode from Route / PPPoE to Bridge, and bind it to a LAN port (usually LAN1). Save.
- Note the VLAN ID before you change anything. The existing INTERNET entry shows a VLAN tag (commonly 10 or 100 depending on circle). Write it down — your own router’s PPPoE profile may need the same VLAN ID, or it will never connect.
- If the WAN settings are greyed out, your ONT is locked by Airtel. Call 121 and request bridge mode — they can push it remotely, and they’ll also give you your PPPoE username and password, which you need for the next step anyway.
Then configure your own router
- Connect your router’s WAN port to the ONT’s bridged LAN port (LAN1).
- In your router’s internet setup, choose PPPoE and enter the username and password Airtel provided.
- If it fails to connect, set the VLAN ID you noted earlier in the router’s PPPoE/IPTV/VLAN section.
- Once PPPoE shows “Connected,” the ONT’s WiFi is dead weight — disable its radios in the ONT’s WLAN settings to cut interference and a few watts of idle power.
Airtel Xstream Fiber router price: what you’re paying for
The ONT/router isn’t sold at retail — it comes bundled with the connection. In general market terms, Airtel typically includes it free with new Xstream Fiber connections, sometimes against a refundable security deposit in the ₹1,000–₹2,000 range depending on plan and city, and installation is frequently discounted or waived during promotions. If the unit fails, warranty replacements are handled by Airtel; out-of-warranty damage (power surge is the common killer) may cost a replacement fee in a similar range.
The real spending decision is your own router if you bridge: entry-level Wi-Fi 6 routers sit in the ₹1,500–₹3,000 range, solid mid-range models with better 5 GHz radios run ₹3,000–₹7,000, and a two-node mesh kit for larger homes typically starts around ₹6,000–₹12,000. For a 1 Gbps plan, buy something with at least AX3000-class 5 GHz and a gigabit-capable WAN port — anything less becomes the new bottleneck.
Common mistakes and ownership realities
- Factory-resetting the ONT to fix a login issue. The pinhole reset wipes the provisioned config — unlike a normal router, the ONT may not reconnect on its own, and you’ll need Airtel to re-provision it. Try password recovery via support first.
- Deleting the whole WAN list in bridge mode. Modify the INTERNET entry only. Wiping VOIP kills your landline; wiping TR069 kills remote management.
- Forgetting the VLAN ID. This is the single most common reason a bridged setup “doesn’t work” — the router is doing PPPoE correctly but on the wrong VLAN.
- Placing the ONT inside a metal rack or behind the TV. If you’re keeping router mode, placement is 80% of your WiFi quality. Elevated, central, out in the open.
- Surge damage. ONTs die from power spikes more than anything else. A basic surge-protected strip is cheap insurance against a replacement fee and a day without internet.
FAQ
192.168.1.1 isn’t opening — what now?
You’re either not connected to the ONT, or your gateway is a different address. Check your device’s default gateway; if it shows 192.168.1.254 or similar, use that. If your own router sits between you and the ONT, connect directly to the ONT first.
Does bridge mode reduce speed?
No — bridging removes a layer of processing, if anything. Speed depends entirely on your own router’s PPPoE and NAT throughput, which is why a gigabit-capable router matters on faster plans.
Can I just plug in my own router without bridging?
Yes — set your router to Access Point mode and connect it to a LAN port. You get better WiFi with zero PPPoE hassle, though you’ll have double NAT unless you use AP mode properly. For most households that’s an acceptable trade.